
We all know the goal of building an online store: to become a business owner and make money.
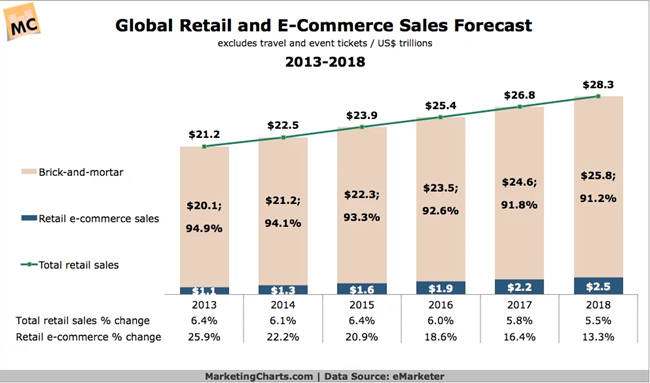
It's a good time to get into the ecommerce business as well, seeing as how online sales have consistently increased over the past few decades, showing us that all online industries have room for new members.
Now, the big question: how do you build an ecommerce site?
Do you need a degree in development or marketing – or business for that matter?
A hard no to all those questions.
Although it doesn't hurt to obtain training, our guide is meant to instruct you on how to build an online store from the ground up, without coding, without fancy degrees, and without significant capital.
How to Build an Ecommerce Website: What You'll Need
There's not a “right” way to complete the online store building process. However, we recommend a few tricks and tools to expedite the construction of your site. We also suggest starting with the following elements:
- Website hosting – Sometimes this comes with the SaaS (software as a service) product you pay for on a monthly basis – like with Shopify (read our full Shopify review) Wix (read our Wix review), or BigCommerce (read our full BigCommerce review). Other services (such as WooCommerce and Magento) require self-hosting. Therefore, you sign up for a separate hosting account and add website files to that server. It's a bit more complicated than a SaaS solution, but you gain more control of your site and can sometimes keep costs lower.
- A site builder – Again, a solution like Shopify already offers hosting and a site builder in one monthly package. There are also third-party page builders for platforms like WooCommerce. Essentially, a site builder serves as a drag-and-drop designer, cutting out the need for coding knowledge and speeding up your ability to launch and manage the site.
- A domain name – The online business name of your store. You can purchase a domain name from your hosting provider or ecommerce platform. These usually cost about $10 per year. Avoid buying one for a few hundred or thousand dollars. The domain name is definitely important, but it's not going to make or break your business.
- A website theme – Unless you hire a designer for a fresh site, a template (or theme) provides the design you need to make your store stand out. It depends on the ecommerce platform, but a good price point to start thinking about for themes is around $50 to $200. We recommend beginning with a theme long before you ever consider a web designer to build from scratch. Having said that, a designer usually helps with adjusting your theme for advanced customizations. Overall, a website theme makes your site, shopping cart, and checkout look pretty.
- Plugins or extensions – A plugin, or extension, expands upon your site's functionality so that you don't have to go out and pay for a developer to make an unusual integration request for you. Most ecommerce platforms offer plugin or addon directories with product categories ranging from social media to marketing strategy and accounting to shipping.
- A potential web developer – Web developers and designers come in handy when you can't figure out a design change through your ecommerce platform. You also may want a developer to create a unique tool on your website, like if you needed a special price calculator or a social media integration. Finally, developers and designers provide full website building services, even if you opt for an ecommerce platform like Shopify. They transform simple websites into behemoths and have more knowledge about the platforms than beginners.
- An ecommerce community – Follow blogs like staging.ecommerce-platforms.com and sign up for forums, Facebook groups, and Reddit threads. People talk about ecommerce all the time on the internet, giving you ideas on what to sell, how to advance your marketing plan, and when to sell different products.
How to Build an Ecommerce Website
The first step in learning how to build an ecommerce website is finding the right platform.
Several options exist, from SaaS (software as a service) solutions to self-hosted platforms. The goal is to figure out what you need as an online seller and what type of website you plan on running. For instance, selling your new invention only requires a simple website with fast hosting and some decent marketing plugins. However, you'll need a platform and theme for large catalogs if you plan on peddling thousands of products.
You'll also want to decide if you're making a B2B or B2C shop. Would you like to dropship products or source them from a manufacturer and ship them yourself? Do you need specific features for marketplace management or rapid shipping? These all factor into your choice.
Luckily, we compiled the best ecommerce platforms that should cover the majority of these situations. We'll focus on using Shopify to build an online store, but it's important to realize that you have many other options.
Choose an Ecommerce Platform
Here's a list of ecommerce platforms we recommend on a regular basis. Some offer packaged services where you receive everything from hosting to ecommerce website builders for a monthly fee. Others present advanced site-building tools with self-hosting involved and more of a developer-oriented interface.
We'll go through a quick rundown of our favorite ecommerce platforms, but feel free to check out our in-depth analysis of the top ecommerce platforms on the market.
- Shopify – An all-around software as a service platform where you pay a monthly fee and gain access to an entire suite of ecommerce tools. It's affordable, easy for beginners, and highly extendable. We typically recommend Shopify as the best place to start when learning how to build an ecommerce website.
- WooCommerce – A self-hosted ecommerce plugin that turns any WordPress website into a fully functional online store. WordPress and WooCommerce are both free, but expenses come around when you have to sign up for things like hosting, domains, and development. Many beginners and advanced users utilize WooCommerce because of its scalability and ease-of-use, but it does have a steeper learning curve than Shopify and BigCommerce.
- BigCommerce – Similar to Shopify in that it provides a combination of ecommerce tools for a set monthly rate. BigCommerce is typically a little more confusing than Shopify, but that's because it includes far more built-in features. Shopify is all about the barebones ecommerce features and adding on with apps when you need them. BigCommerce gives you most of the features you need, eliminating many app requirements.
- Volusion – Again, Volusion provides a monthly service software where you construct a website with the online page builder. It's not quite as popular but we like its themes and the dropshipping program.
- Big Cartel – A less expensive ecommerce platform service with rather low monthly pricing and tools to help artists and creatives sell their stuff.
- Ecwid – This one is like a combination of WooCommerce and Shopify. You gain access to the benefits of a service like Shopify but you still get to utilize the powerhouse content management system of WordPress.
- 3dcart – A simple, affordable alternative to BigCommerce and Shopify. It's not as versatile, but smaller stores may enjoy 3dcart and get some savings out of it.
Sign Up for an Account
Now that you've settled on an ecommerce platform, go to that company's website to configure an account.
For this tutorial, we're using Shopify.
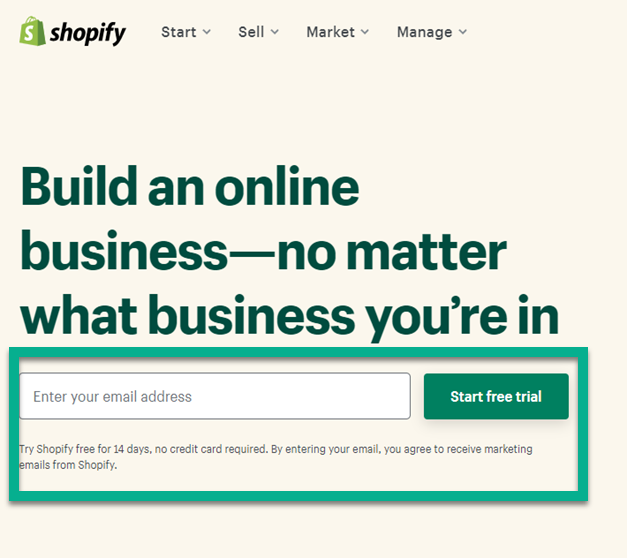
Therefore, navigate to the Shopify homepage to get started.
Type in your email address and click on the Start Free Trial button. If you already own an account, go to the login button to proceed.
Type in your email address and create a password. Make a store name. You can change this later if you haven't decided on one yet.
After that, click the Create Your Store button.

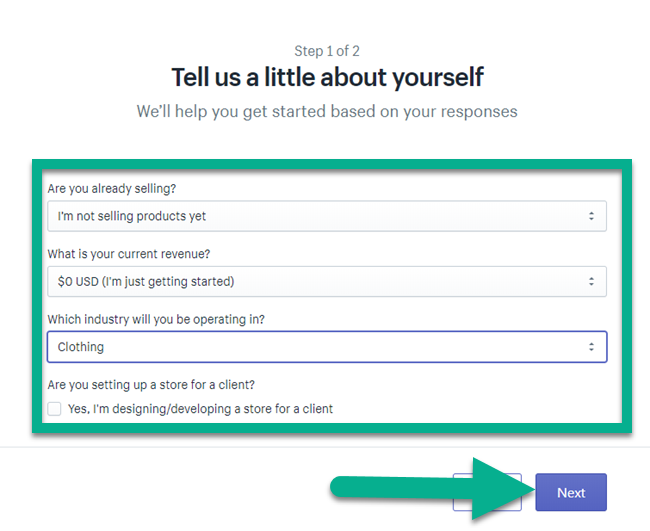
This step isn't all that important, but it helps Shopify with understanding its users. Fill in questions like “Are you already selling?” and “What is your current revenue?” If you'd rather not share, click the Skip button. Otherwise, click the Next button.
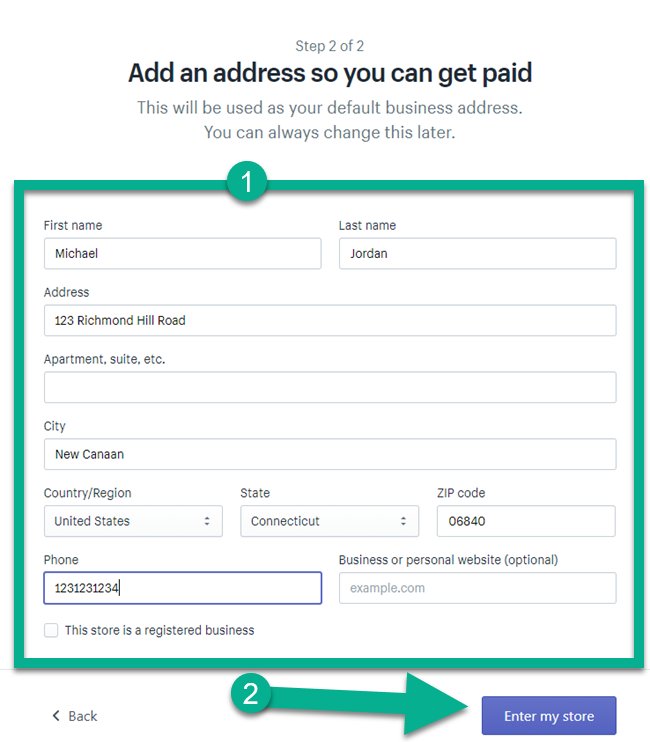
Here's where we start to see crucial store details.
This information is used for your Shopify account. Some get revealed to your new customers and included in things like store receipts.
Type in your online business and personal information like name, address, city, and phone.
Click the Enter My Store button to move on.
Now you're in the Shopify dashboard. Over the years, Shopify has cleaned up the dashboard and consolidated to only show the important buttons and step-by-step instructions.
The left side provides the main menu. Here, we see tabs for things like:
- Orders that come in from customers.
- Products that you create and sell in your store.
- Customers and their contact information.
- Analytics, such as your sales and site visitors.
- Marketing tools for social media and email marketing and others.
- Discounts to give out sales to customers.
- Apps for extending the functionality of your site.
- Sales Channels – Your Online Store is the only channel right now, but you can add options like Facebook, Amazon, Etsy, eBay, and Pinterest.

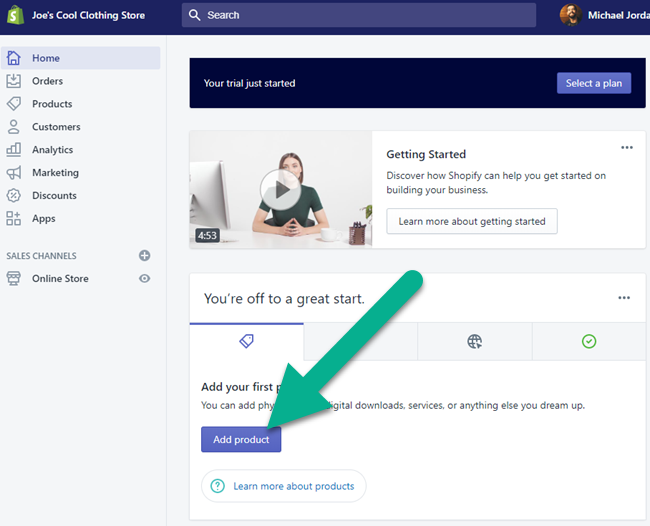
Toward the middle of the page, locate the step-by-step guide to completing your online presence.
The first thing to take care of is adding a product. You can obviously add as many products as you want, but we'll just walk you through the process for one. This is essential when learning how to build an ecommerce website, seeing as how products are the things that make you money!
Add Your First Product
Click on the Add Product button.
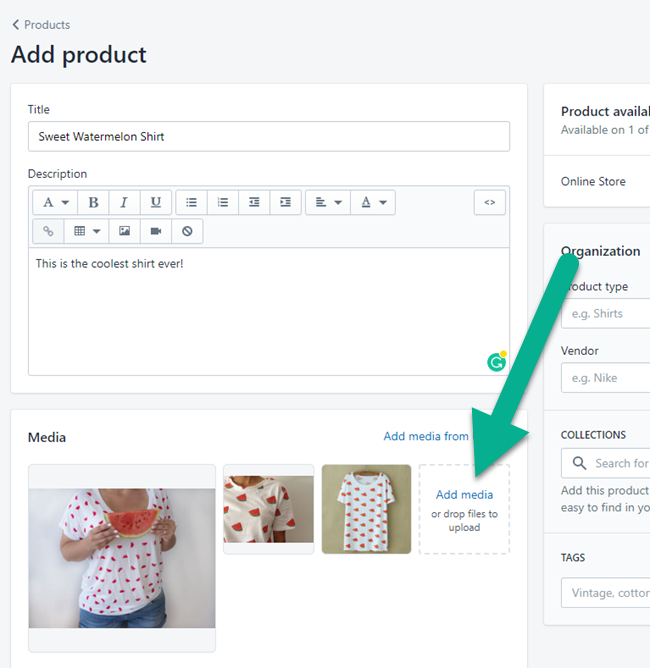
The product creation page includes a wider range of details such as the item's title, description, and pricing.
Begin making your product by adding a Title and Description. These show up on the frontend of your site and ensure that customers know what they're looking at. It's best to be descriptive and spend a good amount of time on both the title and description.
We also recommend using search engine optimization tactics, since these come up on search engines.

Moving on, the Media section asks you to upload images and videos showing your new product.
It's important to have several high-resolution photos and potential videos to increase sales.
Click on the Add Media button to upload them from your computer.
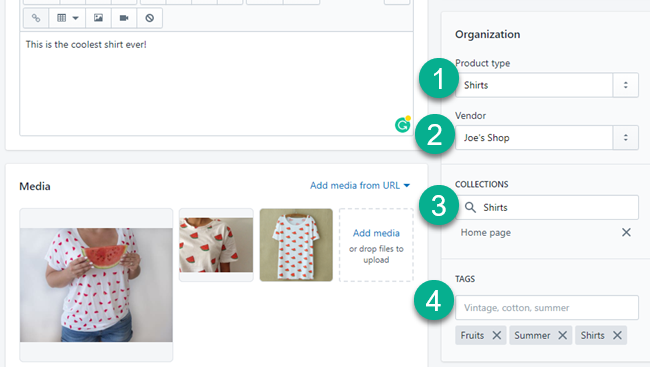
The right side of the page includes an Organization module. Create labels to organize and manage your products so that it's easier to figure out where they go in the future. These are also important for enabling products to automatically show up in the right collections and pages.
Set a Product Type, such as Shirts.
Type in a Vendor. If that's not your company, consider filling in your supplier's name.
Create a collection, or multiple collections to add your product for future organization. We recommend placing popular products in the Home Page collection and generating more collections in the future. These are usually how you keep track of items.
The tags are optional, but they also serve you when finding and organizing products.
Click the Manage link under Product Availability.

This reveals a list of sales channels. Each product has its own sales channels, so you must assign channels to all items. We'll add more sales channels in the future, but for now, make sure the Online Store option is checked.
As your site grows, you may want to sell some products on Facebook but not your online store, or the opposite. Companies have various reasons for switching sales channels, especially while testing new channels.

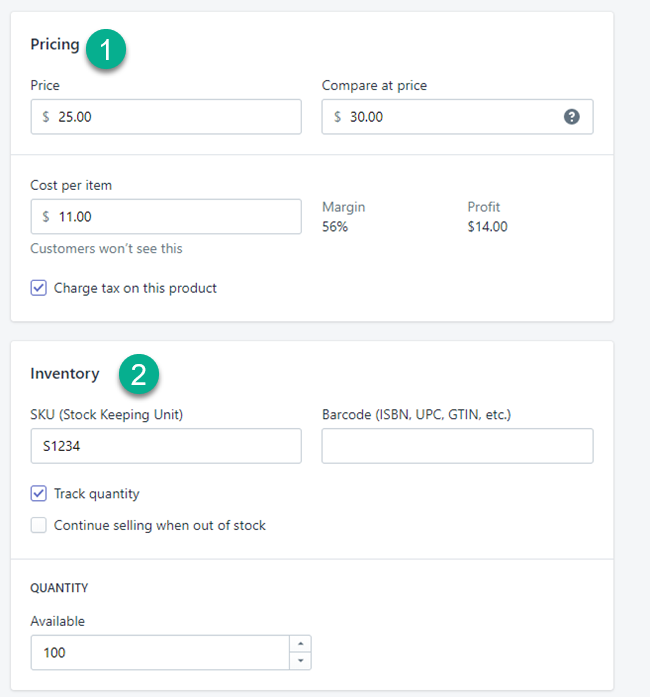
Scroll down on the product page to show the Pricing module.
Type in a price for the item and a comparable price.
You can also fill in the cost per item to see the margin. Most of the time you'll check the “Charge Tax on This Product” box.
The Inventory area asks for details like stock-keeping units and barcodes. You can also fill in the quantity of items you have.
For the Shipping section, check off if it's a physical product, then type in the weight, customs information, and variants.
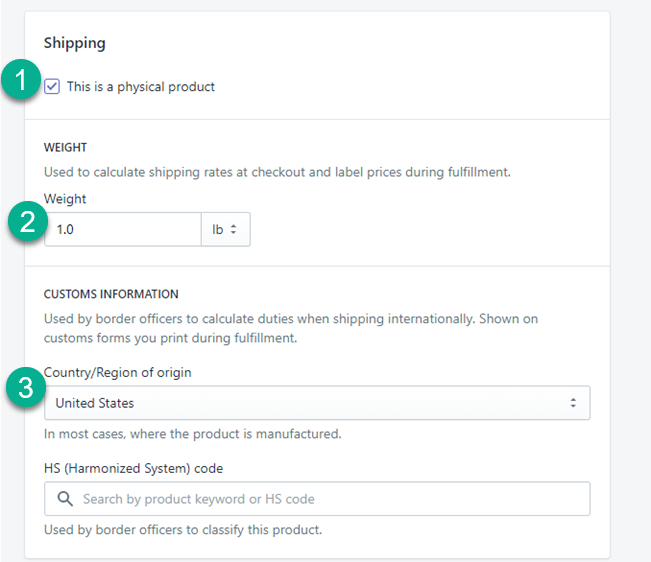
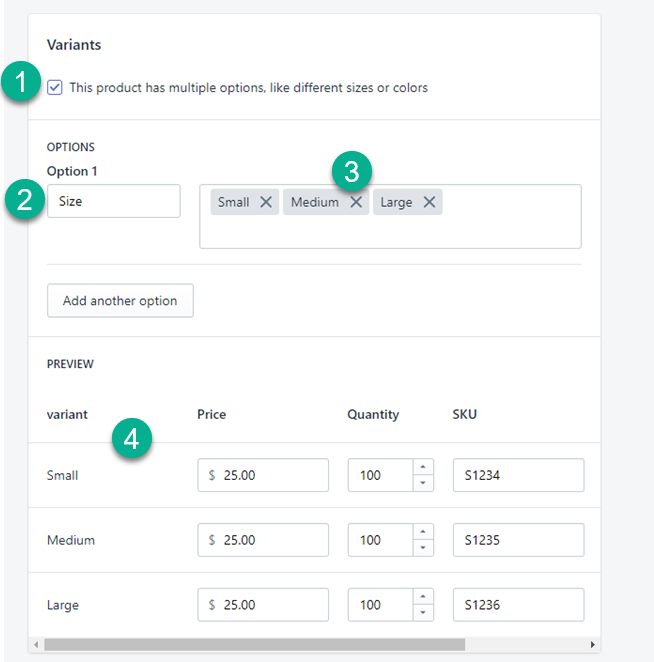
Variants are the alternative versions of each product, like sizes, colors, and designs. It's important to fill in all variants and mark the pricing for each one as well.
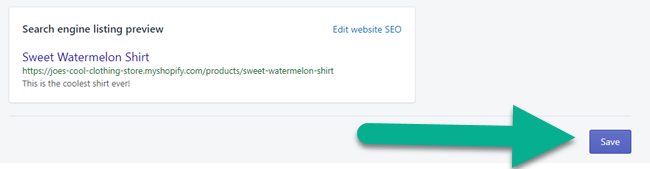
The very bottom of the product creation page has a Search Engine Listing Preview. Check to see if all information is accurate and you like the way it appears for Google searchers. To adjust, edit the Title and Description fields. There's also a link to Edit The Website SEO.
Click the Save button to complete and publish that product to your website.
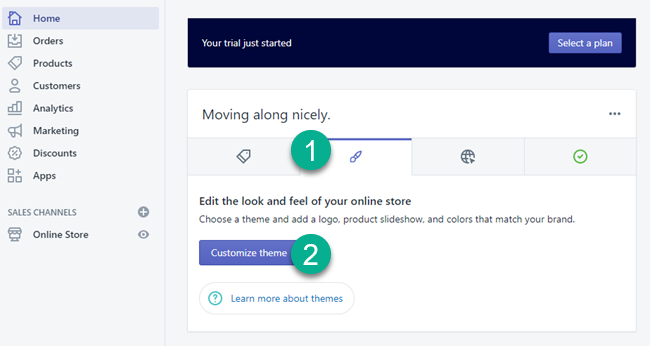
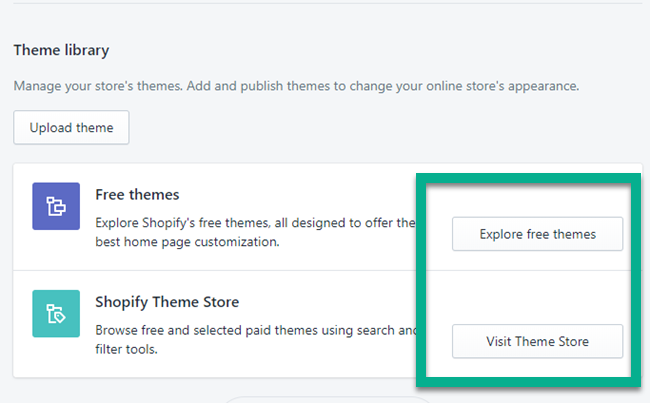
The page presents your current, default theme, along with options to search for and publish other themes. Scroll to the bottom of the page to look for other templates. The Debut theme is typically installed by default, but others are available.

Choose from two options: explore free themes or visit the theme store. I recommend purchasing a premium theme since they look significantly nicer and have more features. However, a smaller store, or a test store, will do fine with a free theme.
Select the theme you like most.

Add the theme to your theme library.

Adding a theme may take a moment. Once you see it on the dashboard, click Actions > Publish to replace the current theme.
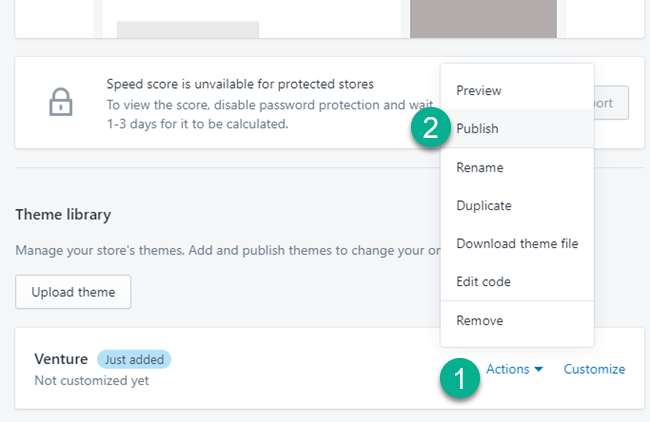
Finally, click the Publish button on the popup module.

Under Current Theme, see that the template you chose is ready to go.
To change elements like colors, designs, logos, and product placements, click the Customize button.

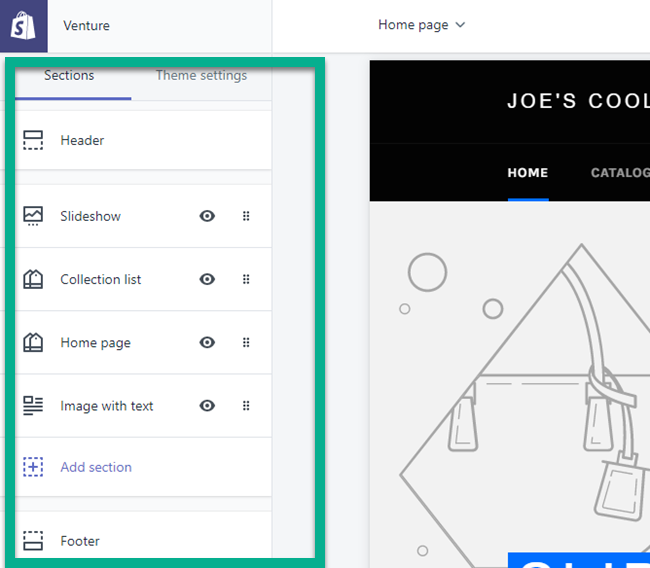
Shopify theme design is managed with items called “sections.”
The sections are located on the left side of the page designer. In this particular theme, sections are labeled Header, Slideshow, Collection List, and more.

You can even see that the product from before is shown on the homepage designer. That's because we added it to the Home Page collection.

As for the sections, dragging and dropping them to move them around is only one part of the equation. You can also click on each one to unveil specific settings.
For instance, choosing the Header section shows settings for the logo, menu, and other elements in the header.
Click the Select Image button to add your logo.
![]()
Thousands of settings come prepackaged in the Shopify designer. These are merely examples of what to begin with when you're designing.
As you can see, the logo we added has a white background, yet the header background is black. Let's change that.
![]()
Go to the Theme Settings tab, then click on Colors.
![]()
Under the Header Background, we can adjust the background to match the white logo.
Feel free to select any of the sections to test other settings.

Now, click the Slideshow section. This area allows us to add a slideshow image or two, or more.
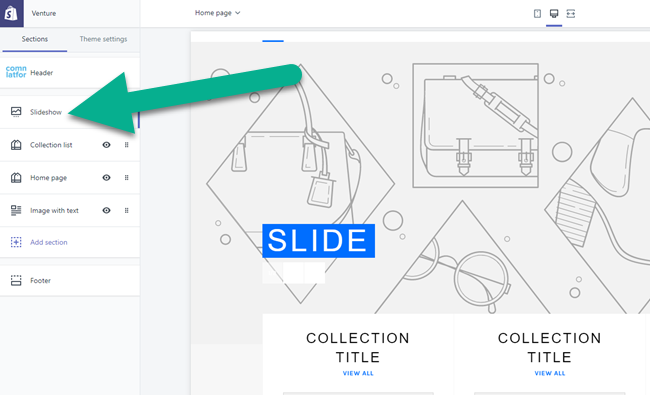
Multiple Slide sections appear. Click on the first one.
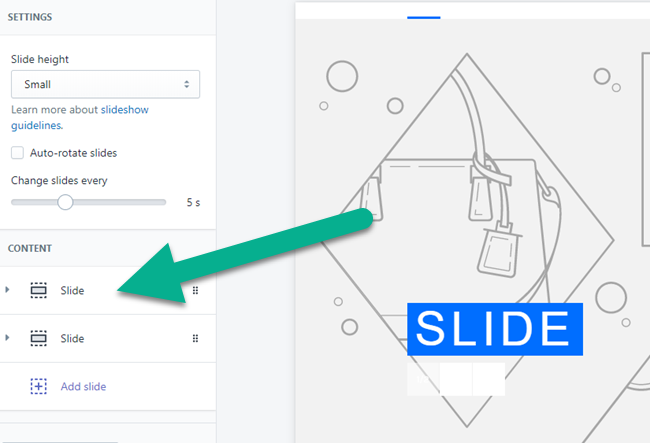
Click on the Select Image button to upload a photo from your computer. As an alternative, Shopify provides a link to explore free images without the need to pay royalties.
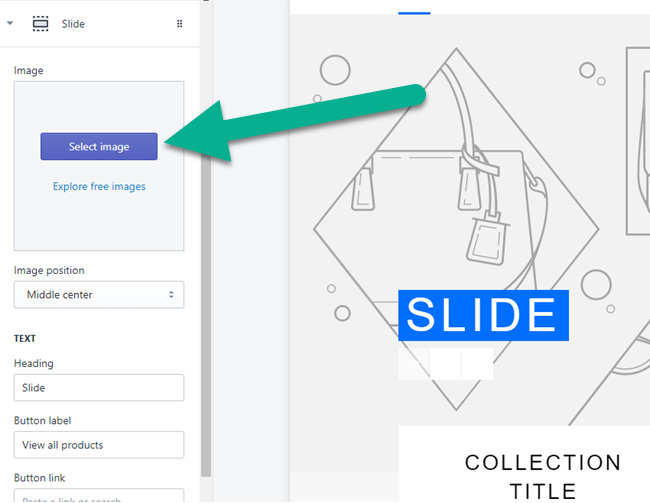
After I added an image, the slider changed in the live preview. That's how most of the Shopify page builder functions – you make a change, then see it prior to publication. When you want to activate the new element on your store, click the Save button.

Overall, we suggest going back to the page builder and playing around with the sections and settings. The GIF below provides an example of how moving one section from top to bottom presents instant results in the preview. The designer is a fluid solution that pretty much anyone can learn.
Add a Domain to Your Ecommerce Store
Your site's design could take hours or weeks depending on how much you want to put into it. It's an area that shouldn't be skimped on, which is why we often suggest hiring professional help if you feel you can't make your store look nice.
After the design takes shape, you must add a domain so potential customers can find your store.
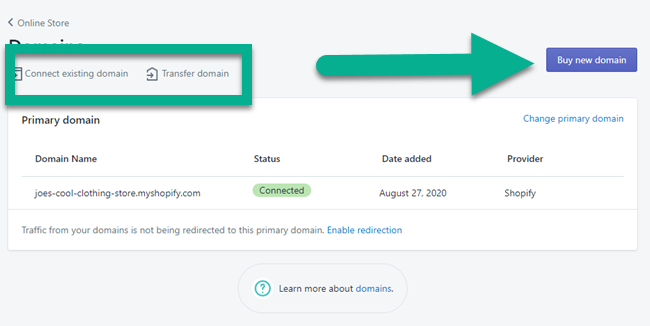
Go back to the dashboard and click on the Add Domain tab.
There's another Add Domain button to click as well.
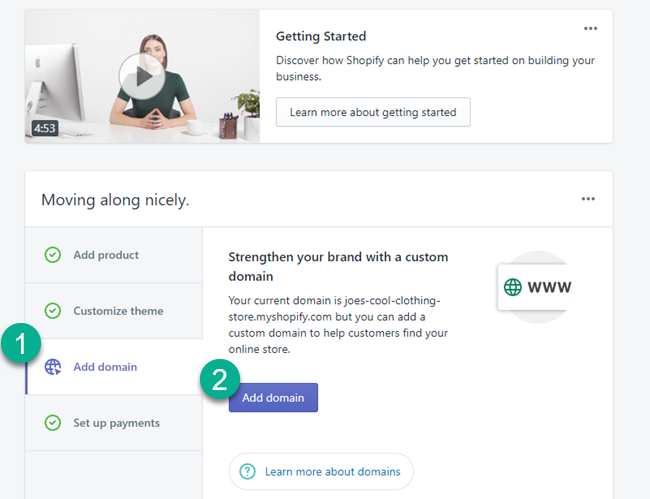
Three options are available for adding a domain. The first involves connecting a domain you already own. The second is for transferring a domain from another host. The third asks you to buy a domain through Shopify.
Go with a process that fits you best.
If you need to buy a domain, type in your desired domain name to see if it's up for sale.
If not, try again.
Once you locate a reasonably priced domain, click on the Buy button.

As for making domain transfers, we highly recommend walking through the steps provided by Shopify. You often have to check with your host or domain provider to make the transfer work. Overall, the best bet is to speak with customer support if you have no idea what you're doing.
Set Up Your Online Store's Payment System
The last essential part of making an ecommerce store is the payment method.
Shopify offers support for hundreds of popular payment options. Therefore, you could process payments through PayPal, Stripe, Authorize.net, and many others.
However, Shopify cuts rates for those who opt for the Shopify Payment processor. You pay no transaction fees and have the chance to lower your credit card rates as your store grows.
To learn about, and configure, payment methods, go back to the Homepage of the dashboard.
Click the Set Up Payments tab, then the View Settings button.

If you scroll down on this page, several payment gateways options appear. Feel free to research the payment gateways to decide which one is right for you. For instance, some companies receive better rates from alternative gateways depending on their location or what's being sold. It all depends on your ecommerce business.
In general, the Shopify Payments method should prove efficient and affordable for most merchants.
To link Shopify Payments, go to the Complete Account Setup button.

It seems long, but you should know how to fill in most of the fields below. Overall, it's asking for your business type, details (like address,) personal details (like name and date of birth,) product details, and product descriptions for what shows up on customer billing statements.
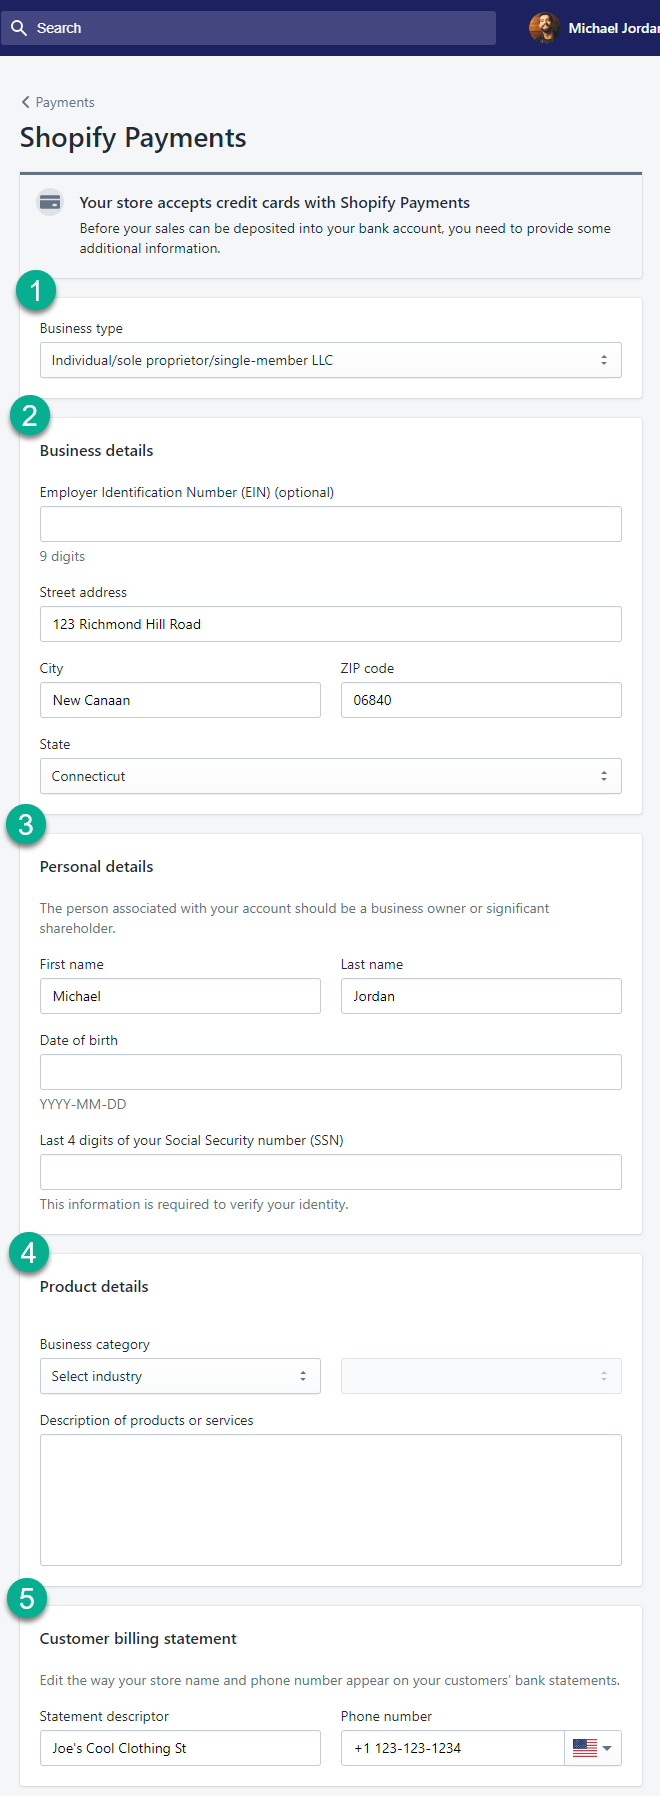
The final piece for billing asks for your banking information. I'm assuming everyone wants to ensure this section is accurate, seeing as how it's how you'll get paid.
Fill in your routing number and account number. You also have the option to automatically take the balance of your sales and put it towards paying your monthly Shopify bills.

Any Questions on How to Build an Ecommerce Website?
Launching an online storefront requires discipline and dedication, but there's no reason to fret about a lack of design skills or the fact that you may have never tried to sell products online before. Solutions like Shopify and BigCommerce and WooCommerce all present streamlined platforms that bring together features for design, marketing, and listing products.
We encourage you to browse through all of Shopify, especially the theme and app stores, considering there always seems to be new buttons, colors, or advanced settings to adjust. And if Shopify doesn't quite cut it for you, think about one of the alternatives such as Bigcommerce, Volusion, or WooCommerce. Each of them has advantages, and sometimes you realize that you simply enjoy one interface over the other. Heck, I'm keen on the themes from Shopify and Bigcommerce, so that's primarily why I tend to gravitate towards those. However, you may think that Volusion designs are significantly better. It's all subjective.
If you have any further questions about how to build an ecommerce website, or if you'd like to give suggestions to other people making their stores, drop a line in the comments section below.
Featured image credits: robuart/DepositPhotos


Comments 0 Responses