
Sending an email to a client or potential customer is one of the easiest ways to show your professionalism and overall branding.
Although it's easy and free to setup an email with Gmail or Yahoo, you look far less credible. That's why a free business email address is required.
For example, a business email address looks something like this:
Therefore, people see that you're a legitimate company, and they can even view where your official website is located. Not only that, but Gmail, Hotmail and other free accounts often get sent to the spam box if you're using them for an email marketing service like MailChimp.
Sounds simple, right?
Well, the problem is you often have to pay for an email address like this…unless you walk through one of the following options:
- Pay for a hosting account at Bluehost, then receive several free business email addresses for you and your employees.
- Use Zoho to grab a free business email account. This only works if you currently own a domain with which you can use.
Yes, you technically have to pay for some sort of domain or hosting, but these are the cheapest options, and you're required to get a domain for a business email anyway.
Therefore, let's take a look at the first option:
Get a Free Business Email Address With Bluehost Hosting
If you're only interested in buying a domain and using it for your emails, we recommend jumping to the Zoho method. Bluehost is a complete hosting, website and email solution, so it's for the companies that would also like to build a website under the selected domain.
Okay, this isn't completely free, but it's generally the best option since you pay for the website and hosting and get the email accounts for free. Therefore, you have your entire online business platform setup and ready to go.
The good news is that Bluehost hosting starts at only $2.95 per month. It's one of the most affordable out there, and the support and uptime is great for small and medium sized businesses.
Finally, you receive a free, one-click installation for WordPress. This means that all you have to do is find a WordPress theme for running your online store or business page and then quickly install WordPress and the theme through Bluehost. After that you'll have a full website along with professional-looking email addresses.
How do you go about setting this up?
Step 1: Get an Account with Bluehost and Choose Your Domain
Go to Bluehost.com to get the process started. Click on the Get Started Now button to continue.

Select one of the three hosting plans. We recommend starting with the Basic plan, since it gives you five free business email accounts right off the bat. In addition, you receive enough website space and bandwidth for most small business websites. Oh yeah, and it's by far the cheapest.

Once you select the plan you will go through the process of purchasing your hosting account, so you will need to punch in some personal information and your credit card number. Once again, keep in mind that you're paying for the hosting and website, not the email addresses.
Step 2: Setup a New Email Address
Upon completing the Bluehost signup, open up your Bluehost CPanel to view all of the settings and options. Scroll down to the area called Email. Click on the Email Manager button.
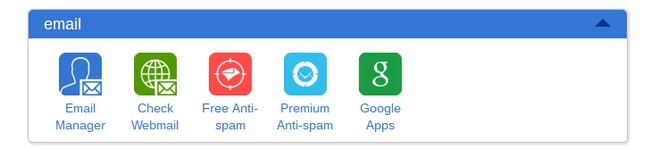
This gives you a list of all the emails currently associated with the account. Since this is a new Bluehost account, you probably don't have any emails in there. Therefore, click on the Create an Email Account button.

This is where you decide on what you would like your email to be called. For example, I did a support@ email account for this tutorial. After that, create an email for logging into the email account. I highly recommend having Bluehost suggest a password, since it'll be much stronger than whatever you make up yourself.
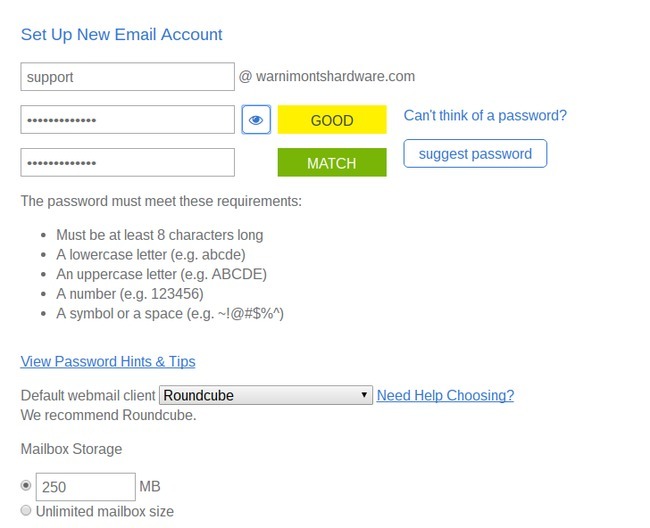
They have some password hints and tips that you can view, along with a Default WebMail Client dropdown menu. Although you can configure an email client like Gmail or Outlook later, this is where your emails will go in the meantime. It's also nice to have access to this inbox in case something goes wrong with your regular email client.
It doesn't really matter which default email client you select, so I'm going with Roundcube.
For some reason Bluehost has a default Mailbox storage of 250MB. It all depends on how many emails you get, but you should just go ahead and change that to unlimited. This way, you won't have to worry about getting error messages if you go past a limit.
After that, click on the Create button to generate your new email address. Congratulations, you now have a brand new address that you can configure with other email clients!
Bonus: Email Forwarding
Sometimes you only need to create an email account in order to forward it to another one. For example, many business people enjoy utilizing their personal email accounts for consolidating both business and personal emails. But this wouldn't look great on a business card. Therefore, they'll generate a more professional email address and forward it to their personal one.
Another reason companies do this is if they need to have a support or sales email address that go to the same person. Either way, it only takes a few minutes to get an email address forwarded to another one.
Stick around in the same Email Account section of Bluehost and click on the Forwarding tab on the left. This will show a list of any current forwards, which is probably empty right now. Click on the Add Email Forwarder button.
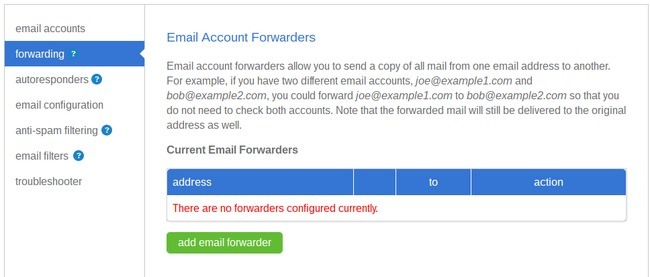
This is rather similar to making a regular email address. So, you'll type in the email address you would like to forward. Then, there's a field called Forward to This Address. This is where you would type in that alternative email address where you want all your mail going to. So, you may punch in your personal email address for quickly accessing all of your inbox items from one email.

You also have the option to discard the email with an error message, pipe to program in your home directory or discard with no error message. None of these are recommended for the average business, so I would just leave these alone.
Bonus 2: Auto Responder
Another cool setting in Bluehost allows you to make an autoresponder if you're going on vacation or if you'd like your customers to receive some sort of correspondence immediately after contacting your support team.
In order to set this up, click on the Autoresponder tab in the Email section of Bluehost. Select the Add Auto Responder button towards the bottom.

Type in the email you would like to create the auto responder for, then specify the name of the person or organization you would like the responder to say the email is coming from. You can add a subject line as well. The main area you'll want to configure is the HTML and Body area.
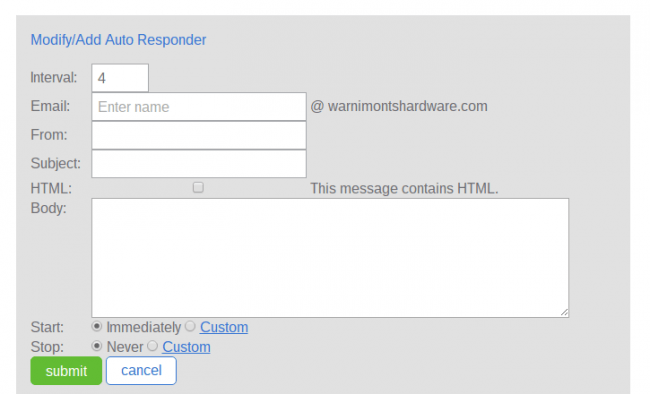
It allows you to specify whether or not HTML is included in the email, and you can go in there and write a pleasant email that you're going to get back to your customers within a reasonable time. The final step is to tell Bluehost that you would like to start the autoresponder now. If this is only a temporary responder, feel free to change the stop time. After that, click Submit.
Setting Up a Free Business Email Address With Zoho
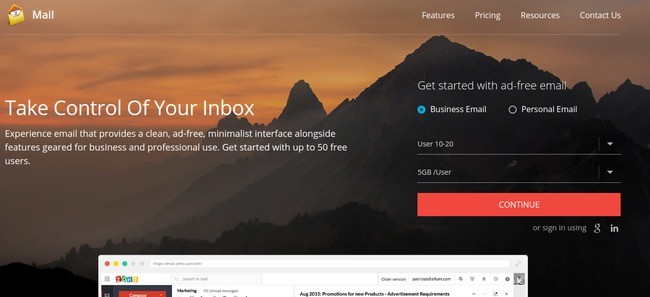
If you already have a business website, you might be stuck with a certain plan that only allows for a handful of email addresses. In that case, there's no reason to upgrade just for additional email accounts. All you have to do is go to Zoho. This is one of the only possible ways to get truly free business email accounts, since they don't charge you anything for the services.
What do you get with Zoho? Up to 25 free business accounts, all with up to 5GB of data. You also gain access to all of the Zoho online office apps. I would argue that most small to midsized businesses would be perfectly happy with this.
Step 1: Go to Zoho and Signup
Navigate to Zoho.com. Choose the Business Email option and up to 25 users and 5GB per user. Click Continue.
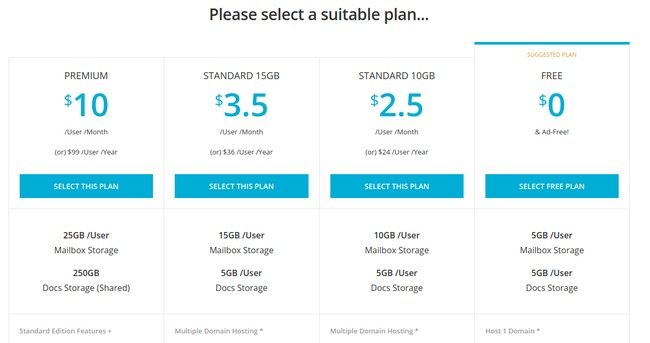
Select the Free plan.
Choose that you'd like to sign up with a domain you already own. You also have the option to buy a domain through Zoho. Type in that domain and all of your personal information. Hit the Sign Up button.


Step 5: Verify That You Own the Domain
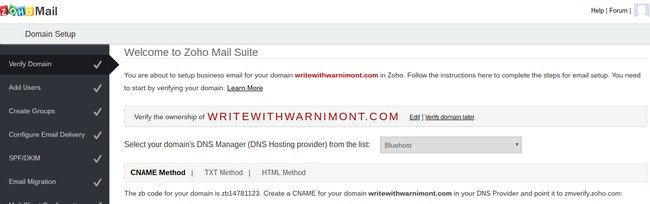
Zoho wants to ensure that you own the domain you're claiming email addresses for. The verification process depends on your hosting account, but they pretty much walk you through everything if you select your host from the drop-down menu.

For this example we're going to be using Bluehost, but feel free to select one of the other hosts in the Zoho dashboard for a step-by-step.
For Bluehost, you will need the CNAME and Destination listed in Zoho.

Open up your Bluehost domains accounts and go to the Domain Manager tab. Look for a checkbox under the domains to view the DNS Settings for that particular domain.
You'll see an Add DNS Record header where you should punch in the CNAME from the Zoho dashboard. Then go to the Points To field to fill it in with zmverify.zoho.com.

The TTL field will most likely fill in by itself, but you should try to make it the lowest possible number for a fast verification process.
Select the CNAME option under the Type field, then click on the Add Record button.

If you would like to see the new record, it's listed under the CNAME (Alias) section.

Step 6: Wait…Then Add Users
You generally have to wait a few hours for everything to get setup. Sometimes it's much faster than that, but we would recommend just closing out of Bluehost and coming back after a few hours.
After that wait, go to your Zoho Mail Control Panel. Look for the Verify button and click on it. If the process has been completed, it should tell you that you have successfully verified and connected with your host. Therefore, you now have access to a bunch of free business email accounts.
The next step of adding new users is completely up to you. For example, you could add one email account or up to 25. It all depends on your organization and how many people in your company require email addresses.
Simply make a name for each of the users and you'll see that you domain is tacked on after the @ for a more professional look to your emails.
What Are Some Other Things you Can Do With Your Free Zoho Emails?
The Zoho system is fairly intuitive and powerful for first time users. You'll see a list of tabs on the left hand side for managing your email addresses and making other decisions on what to do.
For example, some of the tabs are there for:
- Adding users
- Creating groups of users (like if you needed a quick email address that would send to everyone on your support team)
- Configuring email delivery
- Email migration
- Mail client configuration (maybe you'd like to open all of your emails in something like Gmail or Outlook)
- Mobile access (Most business people would like to get their emails on their phones)
Over to You…
The two best ways to get free business email accounts include going through Bluehost and Zoho. The process is pretty simple, you don't have to spend any additional money and it's certainly going to make your business run a little smoother.
Keep in mind that you still have to own a domain, so we tend to recommend signing up with Bluehost for a domain and website anyway. This way, you can setup a beautiful website, have emails for each of your employees and departments and even consider other options like security and ecommerce.
If you have any questions about getting a free business email, feel free to drop a line in the comments below. We also like hearing your feedback, so if you have any other free email address tricks up your sleeve, share them with the group!


Comments 0 Responses